
What Is Aluminium Window Manufacturing Equipment?
Aluminium Window Manufacturing Equipment is the machinery and tooling used to turn aluminium profiles into finished window frames. In a typical workshop, it may include profile-cutting saws, CNC machining centers, corner-crimping presses, drainage mills, and assembly stations. Some production lines also use glazing tables, conveyors, and inspection tools. Each machine handles a different stage, from cutting a profile to joining frame corners. Small measurement differences can affect squareness, sealing, and how smoothly a sash moves. That is why process control matters.
The right equipment depends on the product range, production volume, available floor space, and level of automation. A small fabricator may rely on separate machines and careful manual setup. A larger operation may connect cutting, machining, and handling systems to reduce repeated movements. More automation is not always better; it can add cost and require skilled maintenance. It depends. Operators should check machine specifications, compatible profile sizes, safety features, and service support before choosing equipment. A clean cut is useful, but it does not guarantee a reliable window. Tool condition, accurate settings, and consistent assembly all matter. Small details matter. Even experienced teams need to review their process when profiles, hardware, or designs change. This guide explains the main equipment types, what each one does, and the practical factors manufacturers can consider when planning or improving a production line.
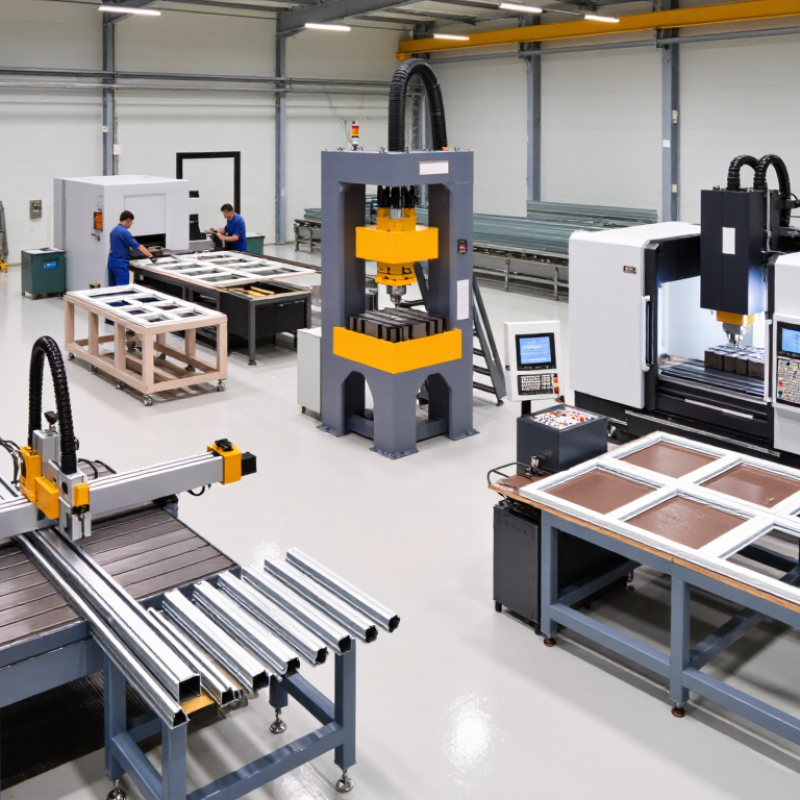
Aluminium Window Manufacturing Equipment: Core Machines and Their Roles
Aluminium window manufacturing equipment turns long profiles into accurately fitted frames and sashes. A double-head cutting saw trims profiles to specified lengths and angles. The blade must suit the profile, and the operator checks stops before each batch. Small errors matter. A slight angle mismatch can leave visible gaps at a corner.
A copy router or CNC machining centre mills slots for locks, handles, and drainage. It follows a measured layout, but setup still matters: the profile must sit firmly against its supports. End-milling machines prepare joining faces, while corner crimping presses connect frame sections with corner cleats. Some workshops also use screw-driving stations to secure reinforcement inside larger profiles. Each machine handles a different task.
The equipment works as a production line, though the sequence may vary with frame design. Operators should inspect the first cut and machined opening before running a full batch. Check dimensions, burrs, and drainage paths. That takes practice. Even advanced equipment cannot correct a poorly measured profile automatically. Regular blade checks and careful fixture setup help keep parts consistent, but workshop conditions can still affect results. A test assembly often reveals issues that measurements alone miss.
What Is Aluminium Window Manufacturing Equipment? — Core Machines and Their Roles
| Production Stage | Equipment | Main Role | Typical Operations | Key Considerations |
|---|---|---|---|---|
| Profile preparation | Profile storage rack and handling system | Stores and moves long aluminium extrusions while helping protect them from dents and surface damage. | Organising profiles by section, length, finish, and production order; feeding them to cutting stations. | Use padded supports and suitable handling methods to limit scratches, bending, and mix-ups. |
| Cutting | Double-head mitre saw | Cuts frame and sash profiles to specified lengths and angles, commonly including 45-degree mitre cuts. | Setting cut length and angle; cutting matching profile pairs for frames and sashes. | Accurate stops, suitable blades, secure clamping, and correct saw alignment help maintain dimensional accuracy. |
| Cutting | Glazing bead saw | Cuts glazing beads to fit the window opening and the selected corner-joining method. | Cutting bead lengths and mitres; preparing pieces to retain the glazing unit. | Bead dimensions and corner details must match the profile system and glass-retention design. |
| Profile machining | CNC profile machining centre | Performs programmed machining on aluminium profiles, often combining several operations in one setup. | Drilling, milling, slotting, and machining holes or openings for handles, locks, hinges, and drainage. | Programs, workholding, tooling, and profile orientation must be correct for each profile and window design. |
| Profile machining | Copy router | Machines repeatable openings and slots by following a template or programmed pattern. | Creating hardware recesses, handle openings, and other local profile features. | Suitable templates, cutters, and clamping are important for consistent placement and clean edges. |
| Profile machining | End milling machine | Removes material from profile ends so intersecting sections can fit together correctly. | Preparing transoms, mullions, and other intersecting frame or sash members. | Settings must match the profile geometry and joint detail to avoid gaps or interference during assembly. |
| Frame and sash assembly | Corner crimping machine | Joins compatible mitred aluminium frame or sash corners by driving corner cleats into the profiles. | Positioning the corner cleat, aligning the mitres, and crimping the corner connection. | Crimping is suitable only for profile systems designed for this joining method; some systems use screws or other connectors. |
| Hardware installation | Hardware assembly bench and installation tools | Supports fitting and adjustment of operating hardware and accessories. | Installing hinges, handles, locks, rollers, stays, and related components. | Hardware positions and fasteners must follow the product design and hardware specifications. |
| Glazing | Glazing table and glass-handling equipment | Provides a stable, protected work area for placing glass or insulating glass units into the sash. | Positioning setting blocks, placing the glass unit, and fitting glazing beads and gaskets. | Glass weight, edge protection, correct block placement, and safe lifting practices are essential. |
| Quality control | Inspection tools and test equipment | Checks finished windows for dimensional accuracy, operation, and visible workmanship. | Measuring diagonals and dimensions; checking sash movement, locking, seals, and finish. | Inspection criteria should reflect the product specification and applicable project or regulatory requirements. |
Related Posts
-
2026 Top Aluminium Window Manufacturing Equipment for Buyers
-
7 Tips for Choosing Aluminium Window Fabrication Machines
-
How to Choose Window Manufacturing Equipment?
-
China Best Window Machinery Manufacturers?
-
How to Choose the Best Aluminum Window Making Machine for Your Needs?
-
Mastering Aluminum Window Machinery Techniques for Optimal Production