
How to Choose the Best Biology Dissection Kit?
Choosing the right Biology Dissection Kit can shape a student’s entire laboratory experience. A well-designed kit should support careful observation, accurate handling, and responsible learning. It should not merely contain many instruments. Each tool must serve a clear educational purpose.
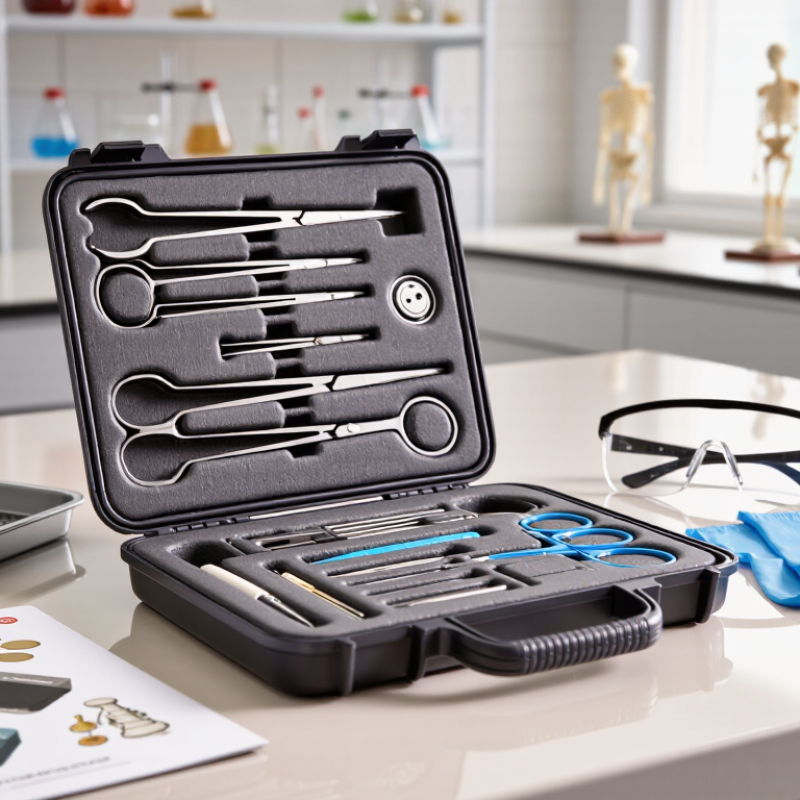
Look for durable forceps, scissors, probes, dissecting needles, trays, and protective equipment. Handles should feel secure, even when students work with wet gloves. Sharp edges require special care. Safety glasses, gloves, and clear instructions should be included or recommended. A reliable kit should also suit the learner’s age, course level, and planned specimens. University biology students may need finer instruments than younger learners. Beginners often benefit from labeled tools and illustrated guidance.
Material quality deserves close attention. Stainless steel usually resists corrosion, but it does not guarantee perfect performance. Hinges can loosen. Blades can arrive poorly aligned. No kit is flawless. That detail matters. Teachers and laboratory professionals should check product specifications, supplier reputation, cleaning guidance, and independent reviews before purchasing. Educational standards and institutional safety policies should guide the final decision. A cheap kit may appear practical, yet replacing broken tools can cost more over time. A premium kit may also include unnecessary items.
The best choice balances safety, usability, durability, and real classroom needs. Think about storage, sanitation, replacement parts, and student comfort. A thoughtful comparison helps prevent rushed purchases. It also makes practical lessons more focused and trustworthy.
Understanding the Purpose and Scope of a Biology Dissection Kit
How to Choose the Best Biology Dissection Kit?
A biology dissection kit should match the lesson’s purpose, not simply contain more tools. Its scope may include anatomy, comparative biology, observation, measurement, and scientific communication. A basic kit needs a stable tray, forceps, a blunt probe, protective eyewear, gloves, and clear instructions. Sharp instruments are not always necessary. For younger learners, safer alternatives may support the same learning goal.
The OECD’s PISA 2022 report recorded an average science score of 485 across participating OECD systems. This does not prove that dissection improves achievement. It does show why practical science needs careful planning and reliable guidance. The UNESCO Science Report 2021 states that women represented 33.3% of researchers worldwide. Therefore, inclusive kit design matters. Instructions should use accessible language, varied examples, and suitable adaptations for different learners.
Teachers should check specimen sourcing, storage conditions, waste procedures, and replacement costs. A kit with poor forceps can damage delicate tissue and weaken observation. A crowded tray can also distract students from the biological question. I would question any product claiming to teach everything. Its learning objectives should be visible before purchase. Reports and classroom experience can guide decisions, but neither replaces a risk assessment. The best scope is often narrower, clearer, and easier to evaluate.
How to Choose the Best Biology Dissection Kit? – Understanding the Purpose and Scope of a Biology Dissection Kit
| Kit Type | Primary Purpose | Typical Specimens or Models | Essential Instruments | Recommended Learner Level | Key Selection Criteria | Safety and Learning Considerations | Overall Suitability |
|---|---|---|---|---|---|---|---|
| Introductory Anatomy Kit | To teach basic specimen handling, external anatomy, and the correct use of common dissection tools. | Prepared preserved specimens, simple animal organs, or durable educational models. | Scalpel or disposable safety blade, dissecting scissors, forceps, probe, dissecting needle, tray, and protective gloves. | Middle school and early secondary education. | Prioritize blunt-ended tools where appropriate, clear instructions, manageable specimen size, and a sturdy tray. | Requires teacher supervision, eye protection, hand washing, and proper disposal of biological materials. | ★★★★★ |
| Plant Anatomy Kit | To investigate plant structures and connect dissection with lessons on tissues, reproduction, and transport. | Flowers, stems, roots, seeds, fruits, leaves, and fresh classroom plant material. | Fine-point forceps, dissecting needle, scalpel, scissors, hand lens, ruler, slides, and a cutting surface. | Primary science through secondary biology. | Choose precision instruments, a magnifying tool, and accessories for labeling or mounting small structures. | Generally low biological risk, but sharp instruments still require supervision and controlled storage. | ★★★★★ |
| Invertebrate Dissection Kit | To examine body organization, organ systems, segmentation, and adaptations in invertebrates. | Earthworms, insects, mollusks, or prepared invertebrate specimens, depending on the curriculum. | Dissecting scissors, fine forceps, blunt probe, sharp probe, pins, tray, and specimen positioning accessories. | Lower secondary and introductory college biology. | Look for fine instruments, corrosion-resistant metal, secure handles, and enough pins for specimen positioning. | Use appropriate preserved specimens, follow local biological-material rules, and avoid direct contact with preservatives. | ★★★★☆ |
| Vertebrate Organ Kit | To demonstrate the relationship between organ structure and function in vertebrate animals. | Prepared heart, kidney, lung, eye, liver, or other animal organs. | Scalpel, dissecting scissors, large and fine forceps, probes, ruler, tray, absorbent material, and protective equipment. | Secondary school and undergraduate biology. | Choose a kit with both robust and precision tools, a spacious tray, and clear organ-identification guidance. | Potential exposure to preservatives or biological material makes gloves, eye protection, ventilation, and supervision essential. | ★★★★★ |
| Fetal Mammal Anatomy Kit | To study mammalian body systems, developmental anatomy, and the spatial relationships among major organs. | Prepared fetal mammal specimens used in comparative anatomy instruction. | Scalpel, dissecting scissors, blunt and fine forceps, probes, pins, tray, ruler, and specimen support materials. | Advanced secondary school and college-level biology. | Assess specimen quality, instructional documentation, instrument durability, and the availability of safe storage. | Requires strict laboratory procedures, appropriate preservation handling, respectful instruction, and regulated disposal. | ★★★★☆ |
| Microdissection Kit | To perform delicate work on very small structures that cannot be handled effectively with standard instruments. | Small plant parts, insect structures, embryos, tissue samples, or microscope-mounted material. | Fine forceps, micro-scissors, minuten pins, fine probes, mounting needles, Petri dishes, and a stereomicroscope. | Advanced secondary school, college, and research-oriented instruction. | Precision, balance, low-friction movement, compatibility with magnification equipment, and secure instrument storage are critical. | Work slowly under magnification and use a stable surface to reduce specimen damage and accidental punctures. | ★★★★☆ |
| Reusable Demonstration Kit | To support repeated classroom demonstrations and introductory practice without relying on a single specimen. | Dissection models, synthetic organs, reusable anatomical replicas, and non-biological practice materials. | Reusable probes, forceps, scissors, blunt practice tools, trays, labels, and cleaning accessories. | Primary, middle school, and large-group instruction. | Prioritize easy cleaning, durable materials, low maintenance, visibility from a distance, and simple storage. | Reduces exposure to preservatives and biological material, but sharp tools should still be controlled and supervised. | ★★★★★ |
| Advanced Laboratory Kit | To support detailed comparative anatomy, independent laboratory work, and structured practical assessments. | Multiple preserved specimens, organs, prepared tissues, and laboratory-specific samples. | Complete tool set with scalpel, scissors, several forceps, probes, pins, ruler, tray, PPE, waste container, and documentation. | College, vocational laboratory training, and advanced biology courses. | Evaluate instrument precision, material quality, replacement availability, ergonomic design, and compliance with laboratory procedures. | Needs documented risk assessment, appropriate ventilation, PPE, specimen handling procedures, and trained supervision. | ★★★★★ |
Selection tip: The best biology dissection kit should match the learner’s age, the specimen type, the intended learning outcomes, the required level of precision, and the laboratory’s safety and storage procedures.